Purple Crayon Art drawing class 2: learning about dark and light
Today we are looking at adding tonal shades to our drawings. We can use tone to give an outline, to show shape and to give mood to a drawing. Tone is how light or dark you make the drawing. Many of you will remember art classes from school where you had to draw cylindrical objects and add the shading. This is basically what we do in all drawings, but not necessarily the way you were taught at school.
I'd like you to look at a couple of artists who use strong tones in their drawings.
Jim Dine : https://www.tate.org.uk/art/artworks/dine-ten-winter-tools-65296/3
Jim Dine's drawings are done as lithographs. Lithographs are basically drawings on stone that are turned into prints. He uses very strong dark and light areas to give the sense of the item he is drawing. It gives a 3D sense to his drawings.
Rembrandt: https://images.app.goo.gl/hKcu5o751Kc781ieA
Rembrandt uses dark and light to emphasise parts of his drawing. Look how much lighter something looks if it is next to a dark area. He uses dark and light to give atmosphere to a drawing.
From the work of these artists, you can see that tone is more that just "shading" a picture.
Both of the exercises I'm showing you today are exercises that I use if I'm starting a new subject, or want to explore the composition of a painting for tone. So add them to your tool box for when you are drawing. I would also suggest you either get yourself a drawing book/sketchbook or keep all your pieces of paper for your work. It's always good to look back to see how you have come on. Even if you don't think you will.
exercise 1: identifying the light areas
Start by covering a page with pencil as shown:
Then instead of using a pencil to draw in the darker tones, I want you to use a eraser to remove the lightest tones of your drawing, then add in some darker tones and line. Like shown.

Some bits will need completely rubbing back and others only need partially removing. Once you think you've got the tones right, you can add in some lines to define your shape if you wish. Using an eraser as a way to define the areas is a good way to simplify the drawing.
Send me the result and if you ask, I'm happy to give you some feedback.
exercise 2: identifying the darkest bits of the drawing
Identify the darkest parts of the drawing and start by filling in those shapes. Rather than drawing lines, I want you to draw shapes of tone. Start with simple shapes and cover the page with the different tones. You can then work into it to add lines. The accompanying video shows you the steps.

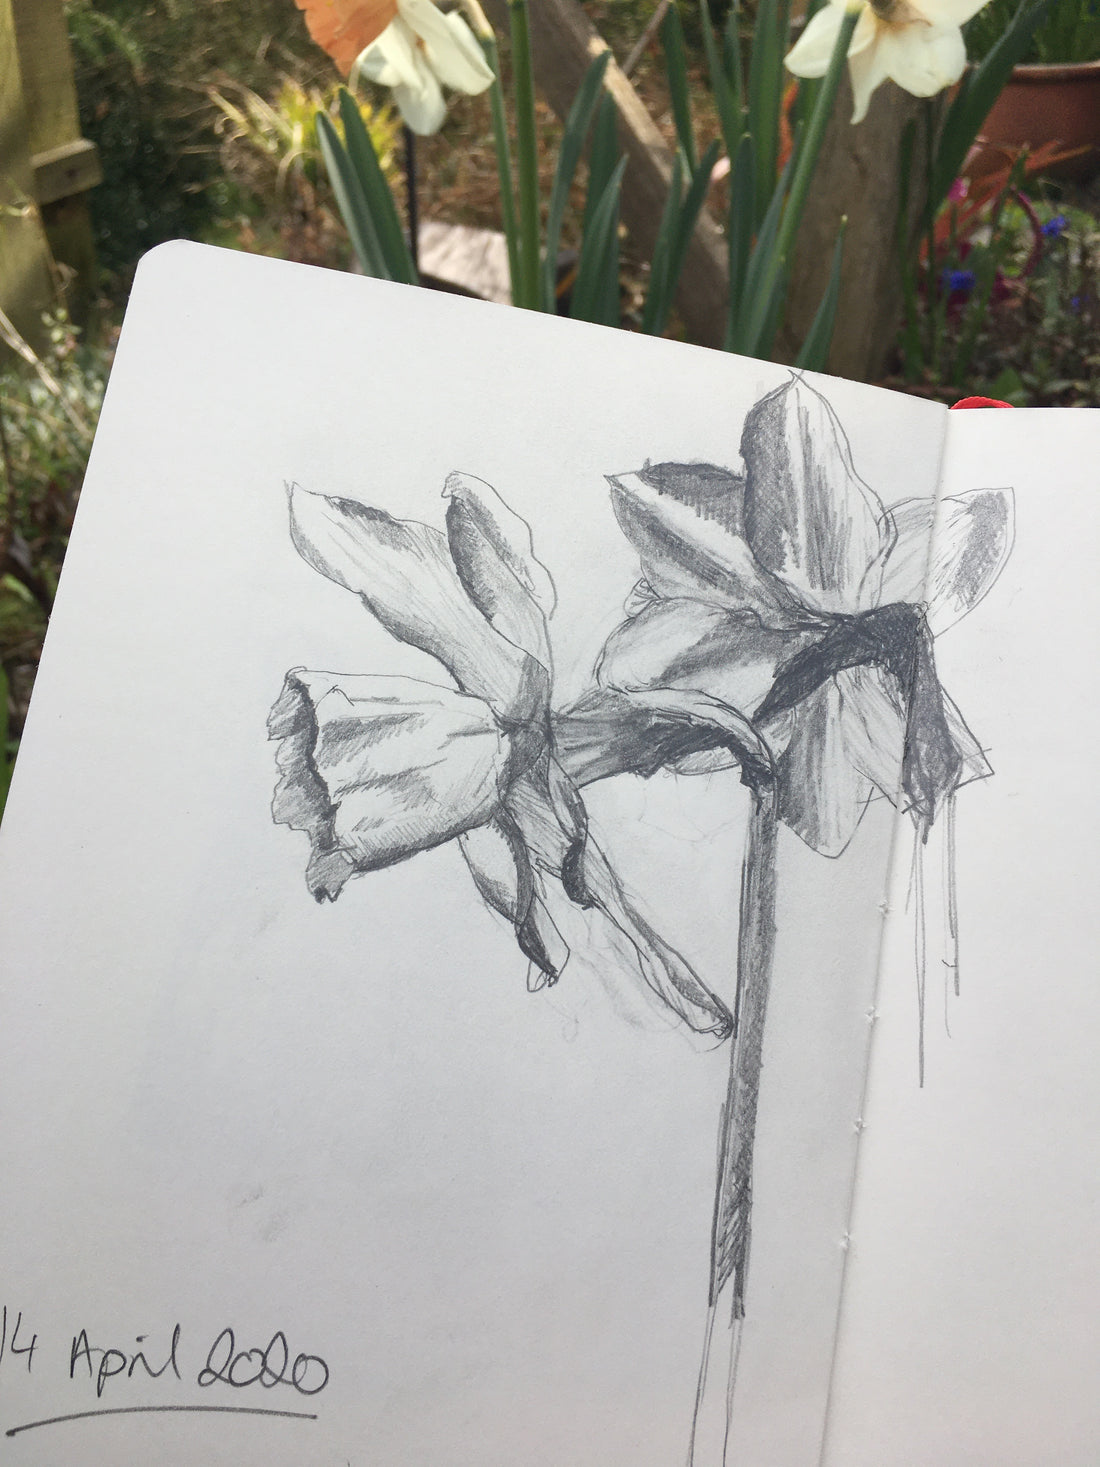
Below is a drawing I spent a bit more time on yesterday while sat in the garden. It doesn't have as much background tone, but it does use tone to show the shape. What is also shows is how a sharp pencil and different type of paper can change your drawing. The firs two drawing swere done on cartridge paper which is quite textured, while the last drawing is on very smooth paper. It's worth trying different types of paper if you have them, it can make a difference to how you draw.

To see the accompanying video for class 2: exercise to identify dark and light tones click here
Link to Purple Crayon Art drawing class 1 here
Link to Purple Crayon Art drawing class 3 here