Purple Crayon Art Class 4 : using the negative space to draw
Today's lesson is about using "negative space" around an object to help your drawing. The negative spae is basically the space that isn't the thing you are drawing, the area around it. It can be used to help with measuring and judging where different bits can go.
If you have a look at Matisse's paintings, he uses the negative space to help his composition.
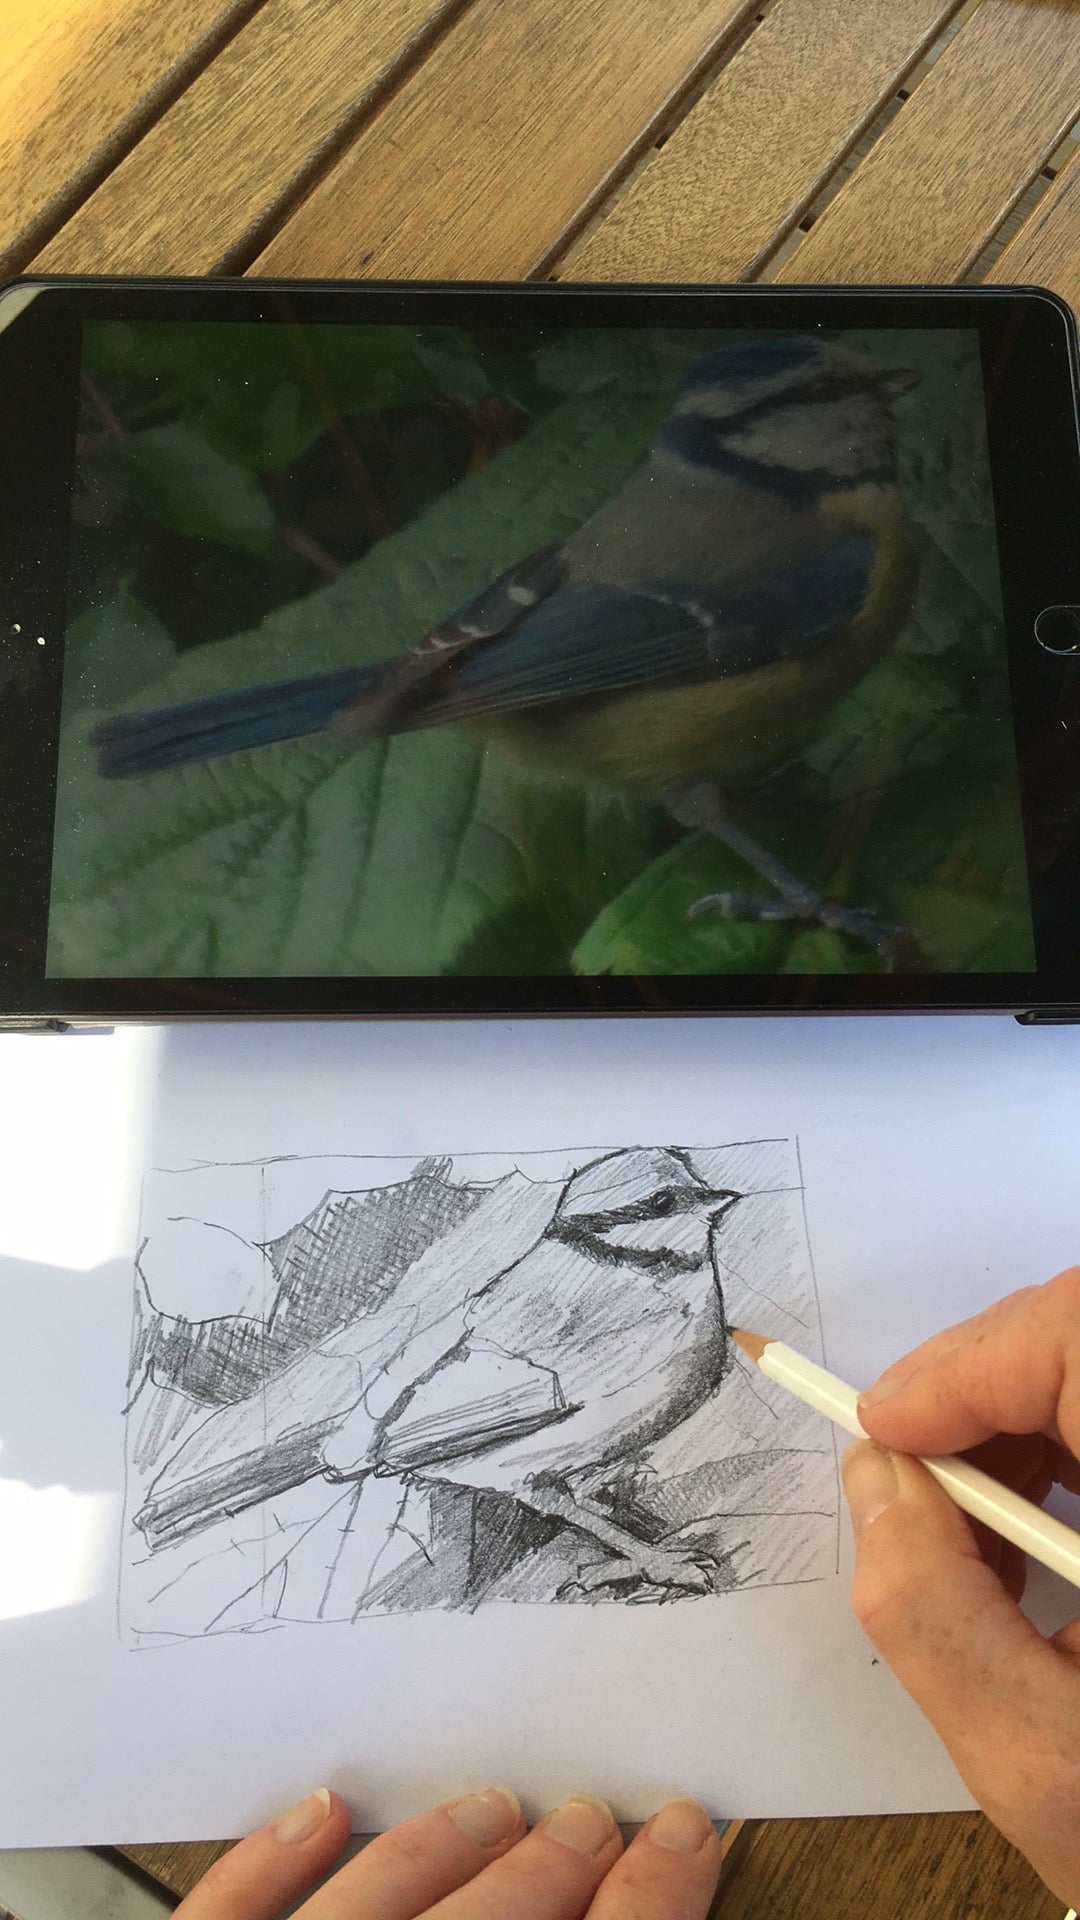
I've had lots of requests for lessons on how to draw birds, so this time I'm using a photo of a bird for the demonstration.
So to start with I want you to put a frame around your image (you can just use 4 piece of paper to frame it. Make the frame to fit the bird as much as you can. Then draw yourself a frame on the page. Try to get it as close in dimensions as you can to the actual frame. Here I've use my ipad to frame the image and have drawn a rough frame on the page.

Nxt I want you to draw some of the negative spaces around the bird. I've started in one corner, drawing the shape of the leaves around the bird.

Keep going until you've got the outline of your bird like shown.

Once you've got your outline, you can start adding in the tone and internal shapes. Start with the more obvious blocks of dark tone and maybe some of the internal shapes in the bird - as this helps you to check if you've got the shape right.


In this instance the blue tit has some dark tones in it's plumage so you can add those into your drawing.

keep looking at your photograph to check the relative tones, working the whole drawing so that it ends up balanced. Check the light source and make sure you haven't added dark shades where there should be light.

Keep going until you are happy with what you've got. Remember that practice helps a lot with getting shapes. If you don't like the shape you've got - have another go. Each time you will be exploring and learning the shape of the bird and each time it will get better.
So to re-cap:
each time you practice, draw in the shapes around the bird first.

Then fill in the shapes within as it will help you double check you've got the shape correct.
If you'd like to see the full process and listen to the lesson, click on this youtube video link.
Click here to go to Purple Crayon Art drawing class 3: Drawing like Stik
Click here to find out more about lessons with Sandra Vick